Some further technical information that could be useful.
Equipment in the Home
Here is what will be provided:
In most cases, WiFi from the eero 7 router can provide a high-quality internet connection to all your devices.
Click below for instructions on how to set these up.
ONT (similar to a cable modem)
The ONT converts the fiber signal to standard Ethernet and connects directly to your router.
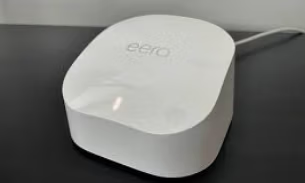
eero 7 Router (with built-in WiFi)
The eero 7 router is the real “brains” of the system and will provide both superb WiFi 7 to all your devices as well as allow for hardwired connections.
Direct TV Stream "Gemini" Box with Remote
The Gemini box sits next to your TV and connects via an HDMI port. It will allow for 100+ channels of Direct TV Stream of entertainment.
Typical Connections
Using the eero 7 WiFi may be all you need. However, if you want to use a “hardwired” cable, here is how you can connect it:
Connect a short Ethernet (CAT 5 or CAT 6) from the eero 7 router into the switch. You probably only need a 4-port or 5-port switch but larger ones are ok too. Then run another Ethernet line to each device you want “hardwired”.
How to Set Up Wifi
Becuase you have a new Eero 7 router, a few simple changes are needed to get all your devices “reconnected” to WiFi. This is not a difficult task and you may have done it before.
Instructions for a Windows or Mac computer
Open Settings (Windows: click the Start button → Settings → Network & Internet. Mac: click the Apple menu → System Settings → Wi-Fi).
Choose Wi-Fi. A list of SSIDs (network names) appears and you will select the one that is your new Eero router.
When prompted, enter your Wi-Fi password.
Instructions for an iPhone or iPad (iOS)
Go to Settings → WiFi .
You’ll see a list of SSIDs. Tap the one that is the one that is your new Eero router.
When prompted, enter your WiFi password.
Instructions for an Android device
Go to Settings → Connections → Wi-Fi (wording may vary by brand) .
You’ll see a list of SSIDs. Tap the one that is the one that is your new Eero router.
When prompted, enter your WiFi password and tap Connect.